Edit your resume: Blocks, Markdown and CSS
Blocks and Advanced are free, and Guided works on the same resume, so you can change mode at any time and keep your place.
Edit on the page with Blocks
Blocks is the free way to edit right on the page. Your resume shows as a white page with one block for the header and one for each section. Pick a mode with the Blocks, Advanced and Guided switch under the editor bar. All three work on the same resume, so you can change mode at any time and keep your place.
- To edit, click a text and type. It saves when you pause and when you leave the field. Enter in a bullet starts a new one, and Escape puts back what was there.
- To style, select some text and choose bold, italic or link.
- To add a section, click, tap or drag a tile from the palette. On a narrower screen, choose Add in the rail to open it, and on a phone choose Tools, where Add comes first.
- To reorder, drag a block by its grip. A line shows where it will land.
- To remove a block, choose its remove button, then Undo in the message that follows if you change your mind.
You do not need a mouse to reorder. Tab to a block’s Move up or Move down button and press Enter, or press Alt ↑ or Alt ↓ while one of its buttons has focus. On a Mac, Alt is the Option key. The same buttons work on a touch screen.
Blocks only changes the lines you edit. Anything it cannot show as a block, such as custom HTML or a page break, is marked as staying as it is. Choose Edit in Advanced to change it there.
Do I lose anything when I switch modes?
No. Blocks, Advanced and Guided all edit the same Markdown and CSS, so a change made in one shows in the others, and Blocks leaves anything it cannot show as a block exactly as you wrote it.
Switch templates and keep your text
The editor has a rail of icons beside the page, in Blocks and Advanced. Templates in the rail opens a panel with every template as a small page of your own resume. The panel floats over the page and closes when you click outside it or press Esc. On a screen at least 1280 pixels wide, the pin button at the top of the panel, Pin beside the page, keeps it open next to your resume while you work. On a phone, choose Tools and then Templates.
Hover over one, or reach it with the keyboard, to preview it on your page. Click or tap to apply it. Browse all templates opens the full gallery, which you can filter by who a template is for. The resume templates page shows each one filled in before you sign up.
A template replaces the CSS and settings, so changes you made there go with it, except your print options (paper, margins, type, header and footer), which stay. Your text stays as it is. Choose Undo in the Now using bar, or press ⌘ Z or Ctrl Z, to bring the previous look back.
Edit the source and print options in Advanced
Advanced is the free way to control every detail. Its tabs hold the source of your resume, with a preview beside them, and your edits save on their own.
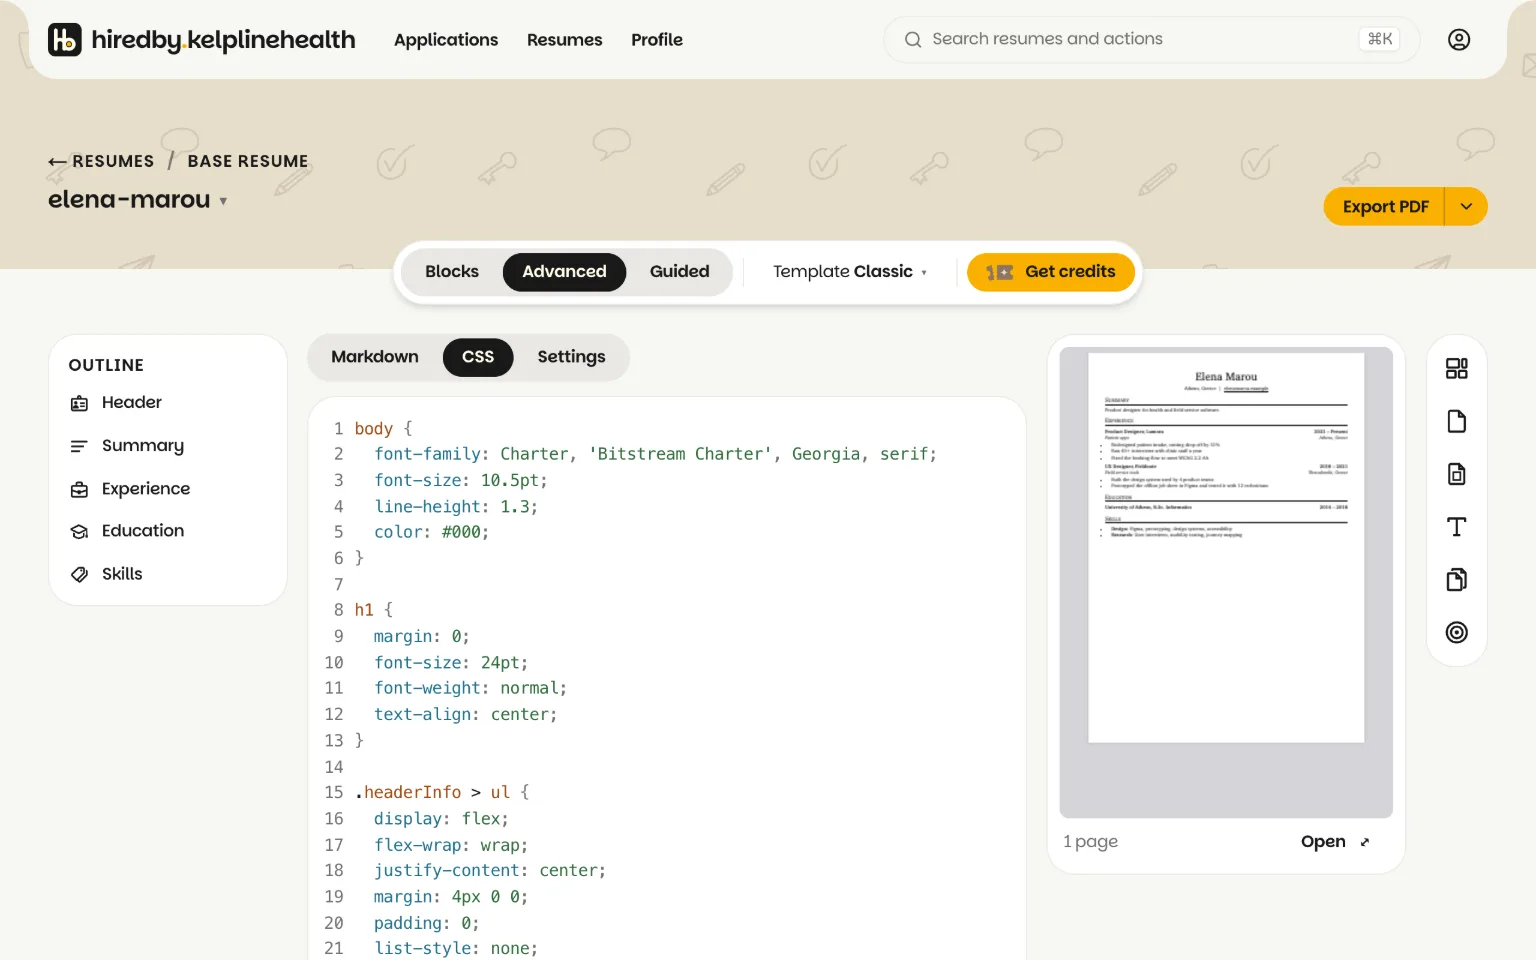
- The Markdown tab holds your words. The sections below explain what it understands, from headings to inline HTML and variables.
- The CSS tab holds the look. It starts as your template’s CSS, and you can change anything in it.
- The Settings tab holds the page setup.
For example, this in the CSS tab colours and underlines every section heading:
h2 {
  color: teal;
  border-bottom: 1px solid teal;
}
Print options change the page without any CSS. Choose Paper, Margins, Type and Pages in the rail, or Print options under the preview in Advanced. Each opens the same floating panel at that group. From 1280 pixels wide you can pin the panel beside the page. On a phone, choose the Tools button and then Print. In Advanced, Tools sits on the Preview tab.
- Paper: A4 or Letter.
- Margins: narrow, normal or wide.
- Type: the base font size and line height.
- Pages: page numbers, a header and footer line, a page break at the caret, keeping one job together, and never splitting a job across pages.
Your choices are saved as one marked block at the end of the Settings tab, and the preview, the print and the PDF all read them. If the last page is nearly empty, the preview offers Remove the page break when there is one, or Fit on one page, which tries smaller margins, line height and type.
Save and print with keyboard shortcuts
- Tab inserts two spaces in the editor.
- ⌘ S or Ctrl S saves now. Edits also save on their own after a short pause.
- ⌘ P or Ctrl P prints the resume.
- Alt ↑ or Alt ↓ moves a block in Blocks while one of its buttons has focus.
Related guides
Prefer to answer questions instead? The Guided AI interview turns your answers into lines on the same resume. To write the source yourself, the Markdown syntax reference covers everything the Markdown tab understands, the Markdown resume builder page explains why you might write it that way, and the resume templates show every layout filled in with a sample resume.